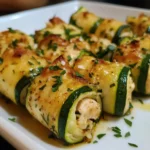

Our family dinners used to be a bit of a predictable rotation, but ever since I stumbled upon and perfected this Stuffed Sweet Peppers with Chicken recipe, it’s become a vibrant highlight of our week. The first time I made them, the aroma alone had my kids peeking into the kitchen, asking what smelled so good. When I finally pulled that baking dish out of the oven, the beautifully blistered, colorful peppers, oozing slightly with cheesy, savory chicken filling, were a sight to behold. My youngest, usually a picky eater when it comes to vegetables, devoured his entire pepper, even asking for seconds of “the yummy chicken boats!” My partner, who appreciates a hearty yet healthy meal, loved the balance of lean protein, wholesome grains, and fresh vegetables. It’s not just the taste, though – it’s the entire experience. The kitchen fills with a comforting, savory scent as they bake, and the vibrant colors of the peppers make any dinner table look instantly more cheerful. This recipe has become my go-to for a satisfying, nutritious, and crowd-pleasing meal that doesn’t require hours of complicated prep. It’s versatile enough for a casual weeknight dinner but also impressive enough to serve to guests. The combination of tender sweet peppers, flavorful chicken, hearty grains, and melted cheese is simply irresistible, and I’m thrilled to share this family-favorite recipe with you.
Ingredients
- 4 large sweet bell peppers (various colors like red, yellow, orange for visual appeal): These form the edible bowls for our delicious filling. Choose peppers that are firm, glossy, and can sit relatively flat when halved. The sweetness of the peppers intensifies when baked and beautifully complements the savory chicken.
- 1.5 lbs boneless, skinless chicken breasts or thighs, cooked and shredded or diced: The star protein of our dish. Using pre-cooked chicken (like rotisserie chicken) saves time, but you can easily cook and shred your own. Thighs will offer more moisture and flavor, while breasts are leaner.
- 1 tablespoon olive oil: Used for sautéing the aromatics, adding a touch of healthy fat and flavor. Extra virgin olive oil is a great choice for its fruity notes.
- 1 medium onion, finely chopped: This aromatic vegetable builds the foundational flavor base for the stuffing. A yellow or sweet onion works best.
- 2 cloves garlic, minced: Adds a pungent, savory depth that is essential to most delicious fillings. Freshly minced garlic offers the best flavor.
- 1 cup cooked quinoa or brown rice: Provides a hearty, wholesome grain element to the stuffing, adding texture and making the dish more filling. Quinoa offers a complete protein, while brown rice provides a nutty flavor and chewy texture.
- 1 (14.5 oz) can diced tomatoes, drained: These add moisture, a slight acidity, and a rich tomato flavor to the filling. Draining them prevents the filling from becoming too watery. Fire-roasted diced tomatoes can add an extra layer of smoky flavor.
- 1 teaspoon dried oregano: A classic herb that pairs wonderfully with chicken and tomatoes, adding a Mediterranean touch.
- 1/2 teaspoon dried basil: Complements the oregano and adds a subtle sweetness to the herb profile.
- 1/2 teaspoon smoked paprika: Lends a beautiful color and a delightful smoky depth to the filling, enhancing the chicken’s flavor.
- Salt and freshly ground black pepper to taste: Essential for seasoning every layer of the dish and bringing out all the other flavors.
- 1 cup shredded cheese (cheddar, Monterey Jack, mozzarella, or a blend): The crowning glory! Melted cheese adds a creamy, gooey texture and a savory, salty bite. A blend often provides the best melt and flavor complexity.
- Optional: 1/4 cup chopped fresh parsley or cilantro, for garnish: Adds a touch of freshness and color when serving, elevating the presentation.
Instructions
- Preheat Oven and Prepare Peppers: Preheat your oven to 375°F (190°C). While the oven is heating, prepare your sweet peppers. Wash them thoroughly under cold running water. Slice each pepper in half lengthwise, from stem to bottom. Carefully remove the seeds and the white pithy membranes from the inside of each pepper half. You can use a small spoon or a paring knife for this. The goal is to create hollow “boats” ready for stuffing. If your pepper halves don’t sit flat, you can shave a very thin slice off the rounded bottom (being careful not to cut through) to create a more stable base. Arrange the pepper halves, cut-side up, in a 9×13 inch baking dish or a large oven-safe skillet. You may want to lightly grease the baking dish to prevent sticking, though the peppers themselves usually release enough moisture.
- Sauté Aromatics: Place a large skillet or pan over medium heat. Add the olive oil and allow it to heat up for a minute until it shimmers slightly. Add the finely chopped onion to the skillet. Sauté for about 5-7 minutes, stirring occasionally, until the onion becomes translucent and softened. This step is crucial for developing a sweet, mellow onion flavor as the base of your filling. Once the onions are softened, add the minced garlic and cook for another minute until fragrant. Be careful not to burn the garlic, as it can become bitter; it just needs a minute to release its aroma.
- Combine Filling Ingredients: To the skillet with the sautéed onions and garlic, add the cooked and shredded (or diced) chicken. Stir well to combine it with the aromatics. Next, add the drained diced tomatoes, cooked quinoa or brown rice, dried oregano, dried basil, and smoked paprika. Stir everything together thoroughly to ensure the seasonings and ingredients are evenly distributed. This is the heart of your stuffed peppers, so make sure it’s well-mixed.
- Season and Add Partial Cheese: Season the chicken mixture generously with salt and freshly ground black pepper to your taste. Remember that the peppers themselves are unseasoned, so the filling needs to be flavorful enough to carry the dish. Taste a small amount (if using pre-cooked chicken that’s safe to taste) and adjust seasonings if necessary. Once you’re happy with the seasoning, stir in about half (1/2 cup) of the shredded cheese into the filling mixture. This helps to bind the filling together and adds cheesy goodness throughout every bite, not just on top.
- Stuff the Peppers: Carefully spoon the chicken and quinoa/rice mixture evenly into each pepper half. Pack the filling in gently but generously, mounding it slightly on top if you have extra. Ensure each pepper is well-filled for a satisfying portion. The vibrant colors of the peppers against the rich hue of the filling will already look appetizing.
- Add Water/Broth (Optional but Recommended): Pour about 1/2 cup of water or chicken broth into the bottom of the baking dish, around the peppers (not into them). This step is important as it helps to create steam in the oven, which will cook the peppers until they are tender-crisp and prevent them from drying out or burning on the bottom.
- First Bake (Tenderize Peppers): Cover the baking dish tightly with aluminum foil. This traps the steam and helps the peppers cook through and become tender. Place the covered baking dish in the preheated oven and bake for 30-35 minutes. The exact time will depend on the thickness of your pepper walls. The goal here is to get the peppers mostly tender.
- Second Bake (Melt Cheese): After the initial baking time, carefully remove the aluminum foil from the baking dish. Sprinkle the remaining 1/2 cup of shredded cheese evenly over the top of the filling in each pepper half. Return the baking dish to the oven, uncovered. Bake for another 10-15 minutes, or until the peppers are fully tender (easily pierced with a fork) and the cheese is melted, bubbly, and lightly golden brown. Keep an eye on them during this stage to ensure the cheese doesn’t burn.
- Rest and Garnish: Once baked to perfection, carefully remove the baking dish from the oven. Let the stuffed sweet peppers rest for about 5-10 minutes before serving. This allows the filling to set slightly, making them easier to serve, and the molten cheese to cool down a bit. Just before serving, garnish with freshly chopped parsley or cilantro, if desired, for a pop of color and fresh flavor.
Nutrition Facts
- Servings: 4 (makes 8 pepper halves, assuming 2 halves per person)
- Calories per serving (approximate): 450-550 calories (This can vary based on the size of the peppers, type of chicken, and amount of cheese used.)
- High in Protein (approx. 35-45g per serving): Primarily from the chicken, protein is crucial for building and repairing tissues, muscle maintenance, and keeping you feeling full and satisfied for longer. This makes the dish a great option for a post-workout meal or a substantial dinner.
- Rich in Vitamin C (significant portion of RDI): Sweet bell peppers, especially red and yellow varieties, are packed with Vitamin C, a powerful antioxidant that supports immune function, collagen production, and helps protect cells from damage.
- Good Source of Fiber (approx. 6-8g per serving): Contributed by the peppers and the whole grain (quinoa or brown rice), fiber aids in digestion, helps regulate blood sugar levels, and promotes a feeling of fullness, contributing to overall gut health.
- Contains Essential Vitamins and Minerals: Beyond Vitamin C, this dish provides other important nutrients like Vitamin A (from peppers), B vitamins (from chicken and grains), and minerals like potassium and iron, all contributing to overall well-being.
- Balanced Macronutrients: This recipe offers a good balance of protein, carbohydrates (primarily complex carbs from grains and vegetables), and fats (from olive oil and cheese), making it a well-rounded and energizing meal.
Preparation Time
- Active Preparation Time: Approximately 25-35 minutes. This includes washing and cutting the peppers, chopping the onion, mincing garlic, and mixing the filling (assuming pre-cooked chicken and grains are used). If you need to cook chicken or grains specifically for this recipe, add an extra 20-30 minutes to your prep time.
- Cooking Time: Approximately 40-50 minutes in the oven (30-35 minutes covered, then 10-15 minutes uncovered).
- Total Time: Approximately 1 hour 5 minutes to 1 hour 25 minutes (excluding time for pre-cooking chicken/grains if not already done).
- Resting Time: 5-10 minutes after baking.
This Stuffed Sweet Peppers with Chicken recipe is relatively quick to assemble, especially if you multitask by preparing the filling while the oven preheats. The majority of the time is hands-off baking, allowing you to relax or prepare a simple side dish.
How to Serve
These Stuffed Sweet Peppers with Chicken are a complete meal in themselves, but here are some ideas to elevate your dining experience and cater to different preferences:
- As a Standalone Main Course:
- Serve two pepper halves per person on a dinner plate.
- A simple drizzle of high-quality extra virgin olive oil or a dollop of plain Greek yogurt or sour cream on the side can add extra richness or a tangy counterpoint.
- With Side Salads:
- Simple Green Salad: A light salad with mixed greens, cherry tomatoes, cucumber, and a lemon vinaigrette complements the richness of the stuffed peppers beautifully.
- Mediterranean Quinoa Salad: If you want to lean into the Mediterranean flavors, a side salad with quinoa, cucumbers, tomatoes, olives, feta, and a lemon-herb dressing would be perfect.
- Arugula Salad: The peppery bite of arugula dressed with balsamic glaze and shaved Parmesan offers a sophisticated contrast.
- With Grain Sides (if not heavily using grains in the filling):
- Crusty Bread: Perfect for soaking up any delicious juices from the peppers or the baking dish. A warm baguette or sourdough slices would be ideal.
- Garlic Bread: A classic pairing that adds an extra layer of savory goodness.
- Lightly Buttered Orzo or Couscous: If you opted for a less grain-heavy filling, a small serving of these can round out the meal.
- Garnishes for Extra Flair:
- Fresh Herbs: Chopped fresh parsley, cilantro, or even chives sprinkled on top just before serving add vibrancy and freshness.
- A Sprinkle of Red Pepper Flakes: For those who like a little heat.
- A Wedge of Lemon or Lime: A squeeze of fresh citrus can brighten up the flavors.
- Crumbled Feta or Cotija Cheese: For an extra salty, tangy kick on top.
- Beverage Pairings:
- White Wine: A crisp Sauvignon Blanc or a light Pinot Grigio would cut through the richness of the cheese and complement the chicken and peppers.
- Light Red Wine: A Beaujolais or a light Pinot Noir could also work, especially if your filling is robust.
- Craft Beer: A Pale Ale or a Lager would be refreshing.
- Non-alcoholic: Sparkling water with a squeeze of lemon or lime, or a homemade iced tea.
- Presentation:
- Serve directly from the baking dish for a rustic, family-style feel.
- For a more elegant presentation, carefully transfer individual stuffed pepper halves to plates using a wide spatula.
- Arrange them on a platter surrounded by fresh herbs or salad greens if serving buffet-style.
Experiment with these serving suggestions to find what best suits your taste and the occasion!
Additional Tips
- Choosing the Best Peppers: Opt for bell peppers that are relatively uniform in size and shape so they cook evenly. Look for peppers with firm, glossy skin and no soft spots. Colors like red, yellow, and orange are generally sweeter than green peppers when cooked, though green peppers offer a slightly more bitter, classic taste that some prefer. Peppers with four lobes on the bottom tend to sit flatter when halved than those with three.
- Pre-cook Peppers Slightly (Optional): If you prefer your peppers exceptionally tender, you can blanch the pepper halves in boiling water for 3-5 minutes before stuffing and baking. Alternatively, you can microwave them for a few minutes. This step shortens the oven baking time needed to get them tender but be careful not to overcook them at this stage, or they might become too soft to hold the filling.
- Customize Your Filling: This recipe is incredibly versatile!
- Different Grains: Try cooked farro, barley, or even couscous instead of quinoa or brown rice.
- Add More Veggies: Incorporate sautéed mushrooms, zucchini, corn, spinach, or black beans into the filling for added nutrients and flavor.
- Spice it Up: Add a pinch of cayenne pepper, red pepper flakes, or a chopped jalapeño (sautéed with the onions) for some heat.
- Different Cheeses: Experiment with provolone, Gruyère, pepper Jack for a kick, or even a sprinkle of Parmesan for a salty bite.
- Make-Ahead Magic: This recipe is great for meal prep.
- Prepare Filling in Advance: The chicken filling can be made up to 2 days ahead and stored in an airtight container in the refrigerator.
- Stuff Peppers in Advance: You can stuff the peppers, arrange them in the baking dish, cover, and refrigerate for up to 24 hours before baking. You might need to add 10-15 minutes to the initial covered baking time if baking from cold.
- Freeze Stuffed Peppers: For longer storage, you can freeze unbaked stuffed peppers. Place them on a baking sheet until firm, then transfer to a freezer-safe bag or container for up to 3 months. Thaw in the refrigerator overnight before baking as directed (you may need extra baking time). You can also freeze cooked stuffed peppers, though the texture of the peppers might be slightly softer upon reheating.
- Ensure Chicken is Cooked Properly: If you’re cooking chicken from scratch for this recipe, ensure it reaches an internal temperature of 165°F (74°C). Shredding or dicing it makes it easier to incorporate into the filling and ensures it’s distributed evenly. Rotisserie chicken is a fantastic time-saver here.
- Don’t Overstuff, But Be Generous: You want enough filling to make each pepper half a substantial portion, but overstuffing excessively can lead to spillage and uneven cooking. A gentle mound on top is usually perfect. The filling will settle a bit as it cooks.
- The Importance of Resting: Letting the stuffed peppers rest for 5-10 minutes after they come out of the oven is crucial. This allows the molten cheese and juices to settle, preventing the filling from spilling out when you cut into them and making them easier to serve. It also prevents burning your mouth on super-hot filling!
- Using Different Types of Chicken: While the recipe calls for cooked and shredded or diced chicken breasts or thighs, you can also use ground chicken. If using ground chicken, brown it with the onions and garlic, drain any excess fat, and then proceed with adding the other filling ingredients. Ground turkey or even ground beef could also be substituted for a different flavor profile.
FAQ Section
Q1: Can I make these Stuffed Sweet Peppers with Chicken vegetarian or vegan?
A1: Absolutely! To make them vegetarian, you can replace the chicken with a plant-based protein like cooked lentils, black beans, chickpeas, crumbled firm tofu, or a meat substitute. Sautéed mushrooms (like cremini or portobello) also add a great “meaty” texture. Ensure your cheese is vegetarian-friendly if that’s a concern. For a vegan version, use a plant-based protein as mentioned, ensure your grain is cooked in vegetable broth, and use a good quality dairy-free shredded cheese alternative. You might also want to add a teaspoon of nutritional yeast to the filling for a cheesy flavor boost.
Q2: What if my peppers are too wobbly and don’t sit flat in the baking dish?
A2: This is a common issue. You can try two things: First, carefully slice a very thin sliver off the rounded bottom of each pepper half to create a flat base. Be cautious not to cut a hole through the pepper. Alternatively, you can prop them up against each other in the baking dish, or use smaller oven-safe ramekins or even a muffin tin (for smaller peppers) to hold them upright. Crumpled balls of aluminum foil can also be used to stabilize them in the baking dish.
Q3: Can I use green bell peppers instead of colored ones?
A3: Yes, you can definitely use green bell peppers. Keep in mind that green peppers have a slightly more bitter and less sweet flavor profile compared to red, yellow, or orange peppers. The cooking time and method remain the same. Some people prefer the classic taste of green stuffed peppers. Using a mix of colors, including green, can also be visually appealing.
Q4: How do I store and reheat leftover Stuffed Sweet Peppers with Chicken?
A4: Leftovers are fantastic! Store any leftover stuffed peppers in an airtight container in the refrigerator for up to 3-4 days. To reheat, you can place them in an oven-safe dish, cover loosely with foil, and bake at 350°F (175°C) for about 15-20 minutes, or until heated through. You can also microwave them, but the oven method helps to keep the peppers from getting too soft and reheats the cheese nicely. Reheat until the internal temperature reaches 165°F (74°C).
Q5: My filling seems a bit dry. What can I do?
A5: If your filling seems dry before stuffing the peppers, you can add a bit more moisture. Consider adding a few tablespoons of chicken or vegetable broth, a little more diced tomato (or a tablespoon of tomato sauce or paste), or even a splash of water. Ensure your cooked grain wasn’t too dry to begin with. Also, the step of adding water/broth to the bottom of the baking dish helps steam the peppers and keep the filling moist during baking.
Q6: Can I prepare the entire dish, bake it, and then freeze it for later?
A6: Yes, you can freeze fully cooked Stuffed Sweet Peppers. Let them cool completely after baking. Then, you can either wrap them individually in plastic wrap and then foil, or place them in a freezer-safe container, separating layers with parchment paper if needed. They can be frozen for up to 2-3 months. To reheat, thaw them overnight in the refrigerator and then bake in a 350°F (175°C) oven for 20-25 minutes, or until heated through. The texture of the peppers might be a bit softer after freezing and reheating, but they will still be delicious.
Q7: I don’t have quinoa or brown rice. What other grains or fillers can I use?
A7: You have many options! You can use white rice, wild rice, farro, barley, bulgur wheat, or even couscous (pearl couscous works particularly well as it’s larger). For a lower-carb option, you could increase the amount of chicken and other vegetables like finely chopped cauliflower (cauliflower rice, added raw or lightly sautéed) or mushrooms, or use a low-carb breadcrumb alternative mixed into the filling for binding.
Q8: How can I ensure the peppers are cooked to be tender but not mushy?
A8: The key is the two-stage baking process. Baking them covered for the first 30-35 minutes allows them to steam and soften. The time can vary based on pepper thickness. Check for tenderness by piercing with a fork; you want them tender-crisp at this stage. Then, baking uncovered allows the cheese to melt and slightly dehydrates the pepper surface, preventing them from becoming overly mushy. Avoid over-boiling or over-microwaving them if you choose to pre-cook them. If you notice the peppers are getting too soft but the cheese isn’t browned, you can briefly broil them (keeping a very close eye to prevent burning) for the last minute or two.

Stuffed Sweet Peppers with Chicken
Ingredients
- 4 large sweet bell peppers (various colors like red, yellow, orange for visual appeal): These form the edible bowls for our delicious filling. Choose peppers that are firm, glossy, and can sit relatively flat when halved. The sweetness of the peppers intensifies when baked and beautifully complements the savory chicken.
- 1.5 lbs boneless, skinless chicken breasts or thighs, cooked and shredded or diced: The star protein of our dish. Using pre-cooked chicken (like rotisserie chicken) saves time, but you can easily cook and shred your own. Thighs will offer more moisture and flavor, while breasts are leaner.
- 1 tablespoon olive oil: Used for sautéing the aromatics, adding a touch of healthy fat and flavor. Extra virgin olive oil is a great choice for its fruity notes.
- 1 medium onion, finely chopped: This aromatic vegetable builds the foundational flavor base for the stuffing. A yellow or sweet onion works best.
- 2 cloves garlic, minced: Adds a pungent, savory depth that is essential to most delicious fillings. Freshly minced garlic offers the best flavor.
- 1 cup cooked quinoa or brown rice: Provides a hearty, wholesome grain element to the stuffing, adding texture and making the dish more filling. Quinoa offers a complete protein, while brown rice provides a nutty flavor and chewy texture.
- 1 (14.5 oz) can diced tomatoes, drained: These add moisture, a slight acidity, and a rich tomato flavor to the filling. Draining them prevents the filling from becoming too watery. Fire-roasted diced tomatoes can add an extra layer of smoky flavor.
- 1 teaspoon dried oregano: A classic herb that pairs wonderfully with chicken and tomatoes, adding a Mediterranean touch.
- 1/2 teaspoon dried basil: Complements the oregano and adds a subtle sweetness to the herb profile.
- 1/2 teaspoon smoked paprika: Lends a beautiful color and a delightful smoky depth to the filling, enhancing the chicken’s flavor.
- Salt and freshly ground black pepper to taste: Essential for seasoning every layer of the dish and bringing out all the other flavors.
- 1 cup shredded cheese (cheddar, Monterey Jack, mozzarella, or a blend): The crowning glory! Melted cheese adds a creamy, gooey texture and a savory, salty bite. A blend often provides the best melt and flavor complexity.
- Optional: 1/4 cup chopped fresh parsley or cilantro, for garnish: Adds a touch of freshness and color when serving, elevating the presentation.
Instructions
- Preheat Oven and Prepare Peppers: Preheat your oven to 375°F (190°C). While the oven is heating, prepare your sweet peppers. Wash them thoroughly under cold running water. Slice each pepper in half lengthwise, from stem to bottom. Carefully remove the seeds and the white pithy membranes from the inside of each pepper half. You can use a small spoon or a paring knife for this. The goal is to create hollow “boats” ready for stuffing. If your pepper halves don’t sit flat, you can shave a very thin slice off the rounded bottom (being careful not to cut through) to create a more stable base. Arrange the pepper halves, cut-side up, in a 9×13 inch baking dish or a large oven-safe skillet. You may want to lightly grease the baking dish to prevent sticking, though the peppers themselves usually release enough moisture.
- Sauté Aromatics: Place a large skillet or pan over medium heat. Add the olive oil and allow it to heat up for a minute until it shimmers slightly. Add the finely chopped onion to the skillet. Sauté for about 5-7 minutes, stirring occasionally, until the onion becomes translucent and softened. This step is crucial for developing a sweet, mellow onion flavor as the base of your filling. Once the onions are softened, add the minced garlic and cook for another minute until fragrant. Be careful not to burn the garlic, as it can become bitter; it just needs a minute to release its aroma.
- Combine Filling Ingredients: To the skillet with the sautéed onions and garlic, add the cooked and shredded (or diced) chicken. Stir well to combine it with the aromatics. Next, add the drained diced tomatoes, cooked quinoa or brown rice, dried oregano, dried basil, and smoked paprika. Stir everything together thoroughly to ensure the seasonings and ingredients are evenly distributed. This is the heart of your stuffed peppers, so make sure it’s well-mixed.
- Season and Add Partial Cheese: Season the chicken mixture generously with salt and freshly ground black pepper to your taste. Remember that the peppers themselves are unseasoned, so the filling needs to be flavorful enough to carry the dish. Taste a small amount (if using pre-cooked chicken that’s safe to taste) and adjust seasonings if necessary. Once you’re happy with the seasoning, stir in about half (1/2 cup) of the shredded cheese into the filling mixture. This helps to bind the filling together and adds cheesy goodness throughout every bite, not just on top.
- Stuff the Peppers: Carefully spoon the chicken and quinoa/rice mixture evenly into each pepper half. Pack the filling in gently but generously, mounding it slightly on top if you have extra. Ensure each pepper is well-filled for a satisfying portion. The vibrant colors of the peppers against the rich hue of the filling will already look appetizing.
- Add Water/Broth (Optional but Recommended): Pour about 1/2 cup of water or chicken broth into the bottom of the baking dish, around the peppers (not into them). This step is important as it helps to create steam in the oven, which will cook the peppers until they are tender-crisp and prevent them from drying out or burning on the bottom.
- First Bake (Tenderize Peppers): Cover the baking dish tightly with aluminum foil. This traps the steam and helps the peppers cook through and become tender. Place the covered baking dish in the preheated oven and bake for 30-35 minutes. The exact time will depend on the thickness of your pepper walls. The goal here is to get the peppers mostly tender.
- Second Bake (Melt Cheese): After the initial baking time, carefully remove the aluminum foil from the baking dish. Sprinkle the remaining 1/2 cup of shredded cheese evenly over the top of the filling in each pepper half. Return the baking dish to the oven, uncovered. Bake for another 10-15 minutes, or until the peppers are fully tender (easily pierced with a fork) and the cheese is melted, bubbly, and lightly golden brown. Keep an eye on them during this stage to ensure the cheese doesn’t burn.
- Rest and Garnish: Once baked to perfection, carefully remove the baking dish from the oven. Let the stuffed sweet peppers rest for about 5-10 minutes before serving. This allows the filling to set slightly, making them easier to serve, and the molten cheese to cool down a bit. Just before serving, garnish with freshly chopped parsley or cilantro, if desired, for a pop of color and fresh flavor.
Nutrition
- Serving Size: one normal portion
- Calories: 550
- Fiber: 8g
- Protein: 45g