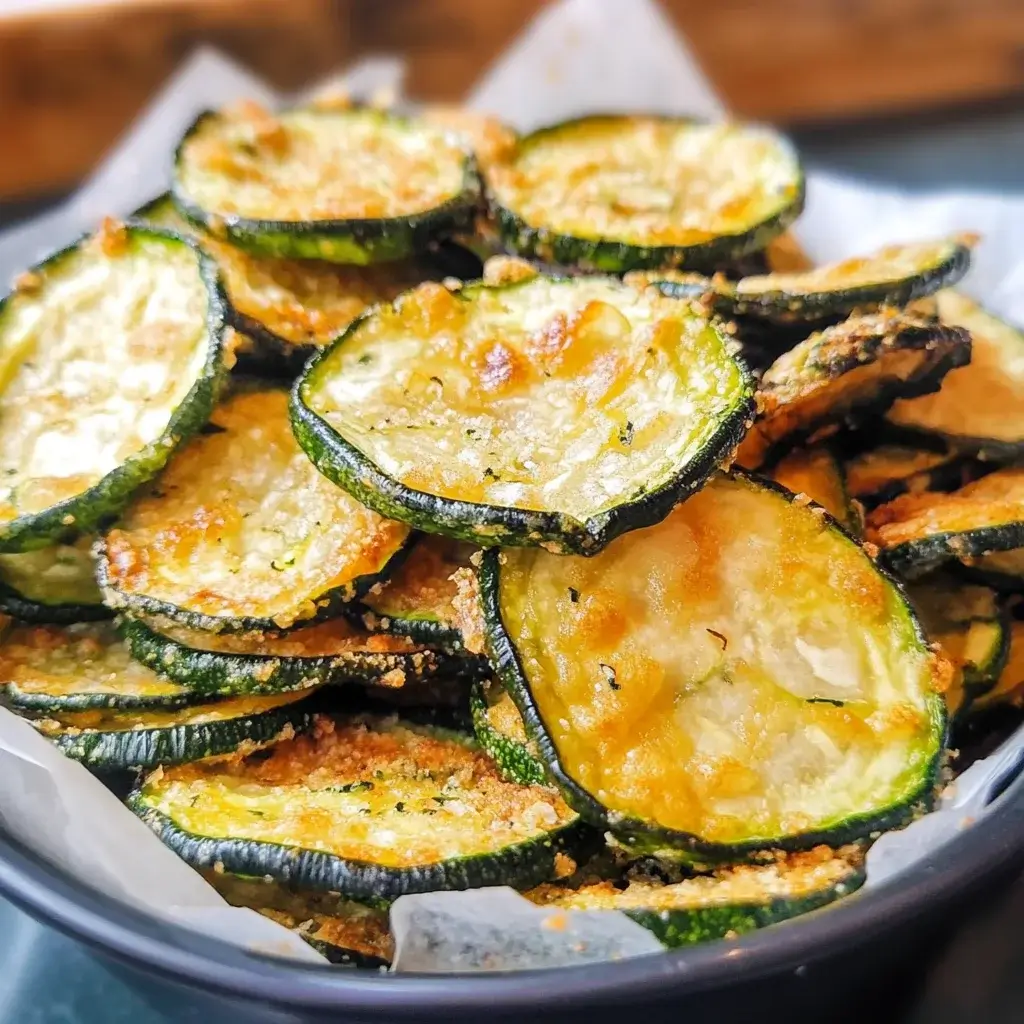
I still remember the first time I decided to tackle homemade Zucchini Chips. My family, especially the kids, are notorious snackers, and I was on a perpetual quest for healthier alternatives to the usual store-bought culprits. Potato chips were a constant request, but the grease and sodium always left me feeling a bit guilty. I’d seen recipes for baked vegetable chips floating around, and zucchini, being so versatile and readily available in the summer, seemed like the perfect candidate. The initial attempts were… a learning curve. Some batches were a bit too soft, others a tad too charred. But then, one sunny afternoon, I cracked the code. The secret, I discovered, lay in a few key steps: slicing them thinly and uniformly, drawing out excess moisture, and a good, crispy coating combined with the right oven temperature. That day, the aroma wafting from the kitchen was irresistible. When I finally pulled out that golden-brown tray of Crispy Vegetarian Zucchini Chips, they vanished in minutes! The kids, initially skeptical (“Green chips, Mom?”), were completely won over by the satisfying crunch and savory flavor. My partner, who usually reaches for the salt and vinegar crisps, declared them “surprisingly addictive.” Now, these Zucchini Chips are a regular in our snack rotation, a guilt-free pleasure that everyone genuinely loves. They’re proof that healthy can be incredibly delicious and satisfying, and I’m thrilled to share the recipe that transformed our family’s snacking habits.
Ingredients
- 2 medium Zucchinis (about 1 lb total): Fresh, firm, and unblemished, these are the star of our show, providing a mild, slightly sweet base.
- 2 tablespoons Olive Oil: Extra virgin is preferred for its flavor and health benefits; this helps the coating adhere and promotes crisping.
- 1/2 cup Panko Breadcrumbs: These Japanese-style breadcrumbs are larger and flakier than regular breadcrumbs, guaranteeing an extra crispy texture.
- 1/4 cup Grated Parmesan Cheese: Adds a salty, umami depth of flavor and contributes to the golden-brown color. For a vegan version, use nutritional yeast or a vegan parmesan alternative.
- 1 teaspoon Garlic Powder: Provides a savory, aromatic kick that complements the zucchini beautifully.
- 1/2 teaspoon Onion Powder: Adds another layer of savory flavor, pairing well with the garlic.
- 1/2 teaspoon Dried Oregano (or Italian Seasoning): Introduces a classic herbaceous note that elevates the overall taste.
- 1/4 teaspoon Smoked Paprika (optional): For a subtle smoky depth and a hint of color.
- Salt and Freshly Ground Black Pepper to taste: Essential for enhancing all the other flavors. Start with about 1/2 teaspoon of salt and 1/4 teaspoon of pepper, adjusting as needed.
- 1 large Egg (or 2 tablespoons of aquafaba/flax egg for vegan): Lightly beaten, this acts as a binder to help the breadcrumb mixture stick to the zucchini slices.
Instructions
- Preheat and Prepare: Preheat your oven to 425°F (220°C). Line two large baking sheets with parchment paper for easy cleanup and to prevent sticking. If you don’t have parchment, lightly grease the baking sheets.
- Prepare the Zucchini: Wash and dry the zucchinis thoroughly. Trim off the ends. Using a sharp knife or a mandoline slicer (highly recommended for uniform thickness), slice the zucchini into rounds approximately 1/8 to 1/4-inch thick. Uniformity is key for even baking and crisping.
- Draw Out Moisture (Crucial Step!): Lay the zucchini slices in a single layer on a clean kitchen towel or paper towels. Sprinkle them lightly with salt (about 1/4 teaspoon). Let them sit for 15-20 minutes. You’ll notice moisture beads forming on the surface. Gently pat the slices dry with another towel or paper towels. This step is vital for achieving maximum crispiness, as excess water will cause the chips to steam rather than bake.
- Set Up Breading Station: You’ll need two shallow dishes or plates.
- In the first dish, lightly beat the egg (or prepare your vegan egg substitute: for aquafaba, just use it as is; for a flax egg, mix 1 tablespoon of ground flaxseed with 3 tablespoons of water and let it sit for 5-10 minutes to thicken).
- In the second dish, combine the Panko breadcrumbs, grated Parmesan cheese, garlic powder, onion powder, dried oregano, smoked paprika (if using), and a pinch of salt and pepper. Mix well until everything is evenly distributed.
- Coat the Zucchini: Working with one zucchini slice at a time, dip it into the beaten egg, ensuring it’s lightly coated on both sides. Allow any excess egg to drip off.
- Dredge in Breading: Immediately transfer the egg-coated zucchini slice to the breadcrumb mixture. Press gently to ensure the breadcrumbs adhere well to both sides. Shake off any excess coating.
- Arrange on Baking Sheets: Place the breaded zucchini slices in a single layer on the prepared baking sheets, making sure they are not overlapping. Overcrowding the pan will lead to steaming and soggy chips, so use two baking sheets if necessary.
- Drizzle with Oil (Optional but Recommended): Lightly drizzle or spray the tops of the zucchini chips with olive oil. This helps them get even crispier and achieve a beautiful golden-brown color. You can also use an oil mister.
- Bake to Perfection: Bake in the preheated oven for 15-20 minutes. After about 10 minutes, carefully flip the zucchini chips using a thin spatula. Continue baking for another 5-10 minutes, or until they are golden brown and crispy. Keep a close eye on them during the last few minutes, as they can go from perfectly crisp to burnt quite quickly depending on their thickness and your oven’s quirks.
- Cool Slightly and Serve: Once golden and crisp, remove the baking sheets from the oven. Let the zucchini chips cool on the baking sheets for a few minutes. They will continue to crisp up as they cool. Serve warm with your favorite dipping sauce.
Nutrition Facts
- Servings: Approximately 4 servings
- Calories per serving: Roughly 150-180 calories (This can vary based on zucchini size, oil used, and exact breadcrumb/cheese amounts)
- Fiber: Good source of dietary fiber, aiding in digestion and promoting satiety. Zucchini itself is naturally fibrous.
- Vitamin C: Zucchini provides a decent amount of Vitamin C, an important antioxidant that supports the immune system.
- Low in Saturated Fat: Especially when baked and using olive oil, these chips are a healthier alternative to deep-fried snacks.
- Protein: The Parmesan cheese and egg (if used) contribute a small but useful amount of protein.
- Relatively Low Carb: Compared to traditional potato chips, zucchini chips are significantly lower in carbohydrates, making them a good option for those watching their carb intake.
Preparation Time
- Prep Time: Approximately 25-30 minutes (includes slicing, salting/drying, and breading the zucchini). Using a mandoline can speed up the slicing process.
- Cook Time: Approximately 15-20 minutes (baking time, including flipping).
- Total Time: Approximately 40-50 minutes from start to finish. This makes them a relatively quick and easy snack or side dish to whip up.
How to Serve
These Crispy Vegetarian Zucchini Chips are incredibly versatile! Here are some delicious ways to serve them:
- As a Standalone Snack:
- Perfect for movie nights, game days, or an afternoon pick-me-up.
- Serve them warm, straight from the oven, for the best texture.
- With Dipping Sauces: This is where they truly shine!
- Classic Marinara Sauce: The acidity and sweetness of marinara beautifully complement the savory chips.
- Garlic Aioli: A creamy, pungent garlic aioli is a match made in heaven. You can make a quick version by mixing mayonnaise with minced garlic, lemon juice, and a pinch of salt.
- Ranch Dressing: A cool and creamy ranch dip is always a crowd-pleaser, especially with kids.
- Spicy Sriracha Mayo: For those who like a kick, mix mayonnaise with sriracha to your desired heat level.
- Greek Yogurt Dip: A healthier option – mix plain Greek yogurt with lemon juice, dill, garlic powder, and a pinch of salt.
- Pesto: The herbaceous, nutty flavor of pesto pairs wonderfully.
- As an Appetizer:
- Arrange them artfully on a platter with a selection of dipping sauces for guests.
- They make a great, lighter alternative to heavier fried appetizers.
- As a Side Dish:
- Serve alongside grilled chicken, fish, or steak for a crispy vegetable component.
- A fantastic accompaniment to burgers (veggie or meat) and sandwiches, replacing traditional fries or potato chips.
- Pair with pasta dishes for an added textural contrast.
- In Salads (for a crunch):
- Roughly chop any leftover (though less crispy) chips and toss them into a salad for a bit of texture and flavor, similar to croutons.
- For Kids’ Lunchboxes:
- While they are best fresh, some kids might still enjoy them slightly less crispy in their lunch. Pack with a small container of dip.
Additional Tips
- Mandoline for Uniformity: For the crispiest and most evenly cooked chips, using a mandoline slicer is highly recommended. Aim for slices between 1/8 and 1/4 inch thick. If slicing by hand, take your time to make them as consistent as possible. Thicker slices will be softer, thinner slices crisper but more prone to burning.
- Don’t Skip the Salting/Drying: Zucchini has high water content. Salting the slices and letting them sit draws out excess moisture. Patting them thoroughly dry afterwards is crucial. Less water means crispier chips, as the zucchini will bake and roast rather than steam.
- Avoid Overcrowding the Pan: Spread the zucchini slices in a single layer on your baking sheets with some space between each chip. If they’re too close together or overlapping, they will steam and become soggy instead of crisping up. Use multiple baking sheets if necessary and bake in batches if your oven is small.
- Experiment with Seasonings: Don’t be afraid to customize the breadcrumb mixture.
- Spicy: Add a pinch of cayenne pepper or red pepper flakes.
- Herby: Try adding dried thyme, rosemary, or a different Italian herb blend.
- Cheesy Variations: Instead of Parmesan, try Pecorino Romano for a sharper flavor, or nutritional yeast for a vegan, cheesy tang.
- Everything Bagel Seasoning: A sprinkle of this in the breading adds a delightful crunch and flavor.
- Air Fryer Option: If you have an air fryer, these zucchini chips turn out exceptionally crispy! Preheat your air fryer to around 375-400°F (190-200°C). Arrange the breaded zucchini slices in a single layer in the air fryer basket (you’ll likely need to cook in batches). Air fry for 8-12 minutes, flipping halfway, until golden and crisp.
- Reheating for Crispness: Leftover zucchini chips will lose some of their crispness, especially if stored in an airtight container. To revive them, reheat in a preheated oven at 350°F (175°C) for 5-7 minutes, or in an air fryer for 2-3 minutes, until warmed through and crisped up again. Avoid microwaving, as this will make them soggy.
- Choose the Right Zucchini: Opt for small to medium-sized zucchinis. They tend to have fewer seeds and a firmer texture than very large ones, which can be more watery. Look for zucchinis that are firm to the touch with smooth, unblemished skin.
- Panko is Key for Crunch: While you can use regular breadcrumbs, Panko breadcrumbs are specifically designed to be lighter and create a much crispier coating. If you only have regular breadcrumbs, your chips might not be as audibly crunchy but will still be delicious. You could try toasting regular breadcrumbs lightly before using them to improve their texture.
FAQ Section
Q1: Why are my zucchini chips soggy instead of crispy?
A1: Soggy zucchini chips are usually due to excess moisture. There are a few common culprits:
* Not salting and drying: You might have skipped or rushed the step of salting the zucchini slices to draw out water and then patting them dry. This is the most crucial step for crispiness.
* Slices too thick: If your zucchini slices are too thick, they will retain more moisture and may not crisp up properly before the outside burns. Aim for 1/8 to 1/4-inch thickness.
* Overcrowding the baking sheet: If chips are too close together or overlapping, they trap steam, which prevents them from crisping. Ensure they are in a single layer with space around each one.
* Oven temperature too low: An oven that’s not hot enough won’t evaporate moisture quickly, leading to steaming. Ensure your oven is preheated to 425°F (220°C).
* Not enough baking time: They might simply need a few more minutes in the oven.
Q2: Can I make these zucchini chips gluten-free?
A2: Yes, absolutely! To make them gluten-free, substitute the Panko breadcrumbs with gluten-free Panko breadcrumbs or finely crushed gluten-free crackers or cornflakes. You can also use almond flour or a mix of almond flour and gluten-free breadcrumbs for a different texture. Ensure your Parmesan cheese is also certified gluten-free if celiac disease is a concern (most pure Parmesan is, but check labels).
Q3: How do I store leftover zucchini chips?
A3: Store leftover zucchini chips in an airtight container at room temperature for up to 2 days, or in the refrigerator for up to 3-4 days. However, be aware that they will lose their initial crispness over time, especially in the fridge due to moisture. For best results, reheat them in an oven or air fryer (as mentioned in the tips) to try and restore some of the crunch before serving.
Q4: Can I make these zucchini chips vegan?
A4: Yes, it’s easy to make a vegan version.
* Egg Substitute: Replace the beaten egg with 2 tablespoons of aquafaba (the liquid from a can of chickpeas), a flax egg (1 tbsp ground flaxseed + 3 tbsp water, let sit for 5-10 mins), or a plant-based milk mixed with a little flour to help it stick.
* Cheese Substitute: Replace the Parmesan cheese with 2-3 tablespoons of nutritional yeast for a cheesy, umami flavor. You can also use a store-bought vegan Parmesan alternative.
Q5: Can I prepare the zucchini slices ahead of time?
A5: You can slice the zucchini a few hours ahead. Store the slices in an airtight container in the refrigerator. However, it’s best to do the salting, drying, breading, and baking process just before you plan to serve them for maximum crispness. Breading them too far in advance can lead to the coating becoming soggy from the zucchini’s moisture.
Q6: What’s the best way to get the breading to stick?
A6: The key is the egg wash (or vegan substitute) and pressing the breadcrumbs firmly.
* Ensure the zucchini slices are patted dry after salting; a slightly damp surface helps the egg adhere.
* Dip fully in the egg, letting excess drip off. Too much egg can make the coating clumpy or fall off.
* Press the zucchini slice firmly into the breadcrumb mixture on both sides. This helps embed the breadcrumbs.
* Handle gently when transferring to the baking sheet.
Q7: My zucchini chips are browning too quickly on the edges but are still soft in the middle. What should I do?
A7: This can happen if your oven has hot spots or if the slices are uneven.
* Reduce Temperature Slightly: If they are browning too fast overall, you can try reducing the oven temperature by 25°F (about 15°C) and extending the baking time slightly.
* Rotate Pan: Rotate your baking sheet halfway through baking to ensure more even cooking.
* Slice Uniformly: This is where a mandoline helps. If some slices are much thinner than others, they will cook faster.
* Lower Rack: If the top is browning too fast, try moving the baking sheet to a lower rack in the oven for the remainder of the cooking time.
Q8: Are these zucchini chips healthy?
A8: Yes, compared to traditional deep-fried potato chips or many other processed snacks, these baked Crispy Vegetarian Zucchini Chips are a significantly healthier option.
* Baked, not fried: This greatly reduces the fat content.
* Nutrient-rich zucchini: Zucchini provides vitamins (like Vitamin C and B6), minerals (like potassium), and dietary fiber.
* Controlled ingredients: You control the amount of salt, oil, and the quality of ingredients used, avoiding artificial additives and preservatives often found in store-bought snacks.
* They can be a great way to increase vegetable intake, especially for picky eaters. While they do have breading and cheese, moderation and mindful eating make them a delicious part of a balanced diet.