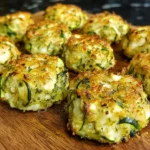
The first time I whipped up these Beef-Stuffed Crescent Puffs, I knew I had stumbled upon a culinary gem. It was a casual Friday night, and I was craving something savory, comforting, but not overly complicated. The aroma that filled my kitchen as these golden-brown beauties baked was simply irresistible – a tantalizing blend of seasoned beef, melting cheese, and buttery pastry. When I finally pulled them from the oven, puffed up and glistening, my family gathered around the counter, eyes wide with anticipation. The verdict? An overwhelming chorus of “Mmmms!” and “More, please!” They disappeared in record time, quicker than any appetizer I’d made in recent memory. Since then, these crescent puffs have become a staple in our home, perfect for everything from a quick weeknight dinner accompanied by a salad, to a star appetizer at parties, or even a satisfying game-day snack. Their versatility is matched only by their deliciousness, and the sheer joy they bring to everyone who tries them is what makes this recipe so special to me. They are wonderfully simple to prepare, yet they deliver a “wow” factor that makes them seem far more intricate. Trust me, once you try these, you’ll be looking for any excuse to make them again and again.
Ingredients
- 1 pound lean ground beef (85/15 or 90/10 recommended): The star protein, providing a hearty and savory base. Using leaner beef helps prevent the puffs from becoming too greasy.
- 1 small yellow onion, finely chopped: Adds a foundational aromatic sweetness and depth of flavor to the beef mixture.
- 2 cloves garlic, minced: Imparts a pungent, savory kick that complements the beef and onion beautifully.
- 1 teaspoon salt (or to taste): Essential for enhancing all the other flavors in the dish.
- 1/2 teaspoon black pepper (or to taste): Provides a gentle warmth and spice.
- 1 teaspoon Worcestershire sauce: Adds a complex umami tang that deepens the beefy flavor.
- 1/2 teaspoon dried oregano (or Italian seasoning): Introduces a subtle herbaceous note that brightens the filling.
- 2 (8 ounce) cans refrigerated crescent roll dough: The convenient, flaky, and buttery pastry that encases the delicious filling. Regular or butter-flake varieties work well.
- 1 cup shredded cheddar cheese (or your favorite melting cheese like Colby Jack, Monterey Jack, or a Mexican blend): Provides a gooey, cheesy, and flavorful element that binds the filling and adds richness.
- 1 large egg, beaten (for egg wash, optional): Brushing the puffs with beaten egg before baking gives them a beautiful golden-brown, shiny finish.
- 1 tablespoon milk or water (mixed with egg for wash, optional): Helps to thin the egg slightly for easier brushing.
Instructions
- Preheat and Prepare: Preheat your oven to 375°F (190°C). Line a large baking sheet with parchment paper for easy cleanup and to prevent sticking. This step is crucial for even baking and prevents the bottoms from becoming overly browned.
- Cook the Aromatics: Place a large skillet over medium heat. Add the finely chopped yellow onion and cook, stirring occasionally, for about 4-5 minutes, or until it becomes translucent and softened. This initial sauté builds a sweet flavor base.
- Brown the Beef: Add the lean ground beef to the skillet with the softened onions. Break it apart with a spoon or spatula and cook, stirring frequently, until it is thoroughly browned and no pink remains. This usually takes about 7-10 minutes. The browning process is key to developing a deep, savory flavor.
- Add Garlic and Seasonings: Once the beef is browned, stir in the minced garlic and cook for another minute until fragrant. Be careful not to burn the garlic, as it can become bitter.
- Drain Excess Fat: Carefully tilt the skillet and spoon out any excess grease. This is an important step, especially if you’re not using very lean beef, as it prevents the crescent puffs from becoming greasy and soggy. You can also drain the beef mixture in a colander lined with paper towels.
- Season the Filling: Return the skillet to low heat (or transfer the drained beef back to the skillet). Stir in the salt, black pepper, Worcestershire sauce, and dried oregano (or Italian seasoning). Mix well to ensure the beef is evenly seasoned. Taste and adjust seasonings if necessary. This is your chance to really make the flavors pop.
- Incorporate Cheese: Remove the skillet from the heat. Add the shredded cheddar cheese to the beef mixture and stir until the cheese is just beginning to melt and is well combined. The residual heat from the beef will help melt the cheese slightly, creating a cohesive filling. Set aside to cool slightly while you prepare the dough; a slightly cooled filling is easier to work with and less likely to melt the dough prematurely.
- Prepare Crescent Dough: Open the cans of crescent roll dough. Unroll the dough sheets onto a lightly floured work surface (or directly onto the parchment paper if you prefer). The dough is typically perforated into 8 triangles per can. Gently separate the triangles along the perforations. If you’re using crescent dough sheets that aren’t pre-perforated, simply cut them into 8 equal triangles per sheet.
- Fill the Triangles: Take one crescent triangle. Place approximately 1 to 1.5 tablespoons of the beef and cheese mixture onto the wider end of the triangle. Be careful not to overfill, as this can make it difficult to seal the puffs and may cause them to burst open during baking.
- Roll the Puffs: Starting from the wide end with the filling, carefully roll up the triangle towards the pointed end. Try to roll it snugly but not too tightly. You can gently stretch the dough if needed to fully encase the filling.
- Seal and Shape (Optional): Once rolled, you can leave them in the classic crescent shape, or you can gently curve the ends inward to form a more pronounced crescent. Ensure the tip is tucked under or pressed lightly to seal. Some people also like to pinch the side edges to further secure the filling.
- Arrange on Baking Sheet: Place the filled and rolled crescent puffs onto the prepared baking sheet, ensuring they are spaced about 1-2 inches apart to allow for even baking and air circulation.
- Apply Egg Wash (Optional but Recommended): In a small bowl, whisk together the large egg with 1 tablespoon of milk or water. Using a pastry brush, lightly brush the tops of each crescent puff with the egg wash. This step is optional but highly recommended as it gives the puffs a beautiful, glossy, golden-brown finish.
- Bake: Transfer the baking sheet to the preheated oven. Bake for 12-17 minutes, or until the crescent puffs are a deep golden brown, puffed up, and the filling is bubbly if any peeks through. Keep an eye on them, as oven temperatures can vary.
- Cool Slightly and Serve: Once baked, carefully remove the baking sheet from the oven. Let the Beef-Stuffed Crescent Puffs cool on the baking sheet for a few minutes before transferring them to a wire rack or serving platter. They are best served warm. The filling will be very hot, so allow a brief cooling period to avoid burns.
Nutrition Facts
- Servings: This recipe typically yields 16 puffs (2 cans of dough, 8 puffs per can). A suggested serving size could be 2-3 puffs.
- Calories per serving (approx. 2 puffs): Around 300-380 calories, depending on the leanness of beef and type/amount of cheese.
- Protein: A good source of protein, primarily from the ground beef and cheese, crucial for muscle maintenance and satiety.
- Fat: Contains saturated and unsaturated fats from the beef, cheese, and crescent dough. Using leaner beef can help manage the fat content.
- Carbohydrates: Primarily from the crescent roll dough, providing energy.
(Note: Nutritional values are estimates and can vary based on specific ingredients, brands, and portion sizes used. For precise information, using a nutritional calculator with your exact ingredients is recommended.)
Preparation Time
- Active Preparation Time: Approximately 20-25 minutes. This includes chopping the onion, cooking the beef and onion mixture, seasoning, and assembling the puffs.
- Baking Time: Approximately 12-17 minutes.
- Total Time: Approximately 35-45 minutes from start to finish.
- Short Description: These Beef-Stuffed Crescent Puffs are a relatively quick and straightforward recipe, making them ideal for a weeknight treat, a speedy appetizer for guests, or a fun cooking project with minimal fuss. The use of refrigerated crescent dough significantly cuts down on prep time.
How to Serve
Beef-Stuffed Crescent Puffs are incredibly versatile. Here are some fantastic ways to serve them:
- As a Crowd-Pleasing Appetizer:
- Arrange them artfully on a platter, perhaps garnished with fresh parsley or chives.
- Serve alongside a variety of dipping sauces. Popular choices include:
- Warm marinara sauce
- Ranch dressing
- Spicy ketchup or Sriracha ketchup
- Queso dip or a cheese sauce
- Garlic aioli
- Sour cream with chives
- For Game Day or Parties:
- Their handheld nature makes them perfect for casual gatherings where guests are mingling.
- They can be made slightly ahead and kept warm in a low oven until serving.
- As a Quick Weeknight Meal or Lunch:
- Serve 2-3 puffs per person.
- Pair them with a simple side salad (like a Caesar or garden salad) for a balanced meal.
- Steamed or roasted vegetables (broccoli, green beans, carrots) also make a great accompaniment.
- A side of coleslaw or a fruit salad can add a refreshing contrast.
- For Potlucks:
- They travel well and are always a hit. Transport them in a covered dish and reheat briefly if possible before serving.
- Brunch Addition:
- While savory, they can be a hearty addition to a brunch spread, especially if you have guests who prefer savory over sweet.
- Kid-Friendly Snack:
- Their size and familiar flavors make them appealing to children. Serve with a mild dipping sauce they enjoy.
No matter how you choose to serve them, ensure they are warm for the best experience – the melted cheese and flaky pastry are at their peak when fresh from the oven or gently reheated.
Additional Tips
- Don’t Overfill: It can be tempting to load up the dough, but overfilling will make it difficult to seal the puffs properly and can lead to the filling oozing out during baking, creating a mess and potentially soggy bottoms.
- Ensure a Good Seal: Pinch the edges of the dough firmly after rolling, or press the tip down securely to prevent the puffs from unrolling or the filling from escaping.
- Spice it Up: For those who like a bit of heat, add a pinch of red pepper flakes, a dash of hot sauce, or some finely chopped jalapeño (seeds removed for less heat) to the beef mixture.
- Veggie Power: Feel free to incorporate other finely chopped vegetables into the beef mixture for added flavor and nutrition. Sautéed mushrooms, bell peppers (any color), or even spinach (squeezed dry) would work well. Cook them along with the onions.
- Cheese Variations: Experiment with different types of cheese. Pepper Jack can add a spicy kick, provolone offers a mild meltiness, or a blend of Italian cheeses can provide a different flavor profile. Smoked gouda would also be delicious.
- Make-Ahead Option: You can prepare the beef filling a day in advance. Store it covered in the refrigerator. When ready to bake, simply assemble the puffs with the chilled filling and bake as directed (they might need an extra minute or two in the oven).
- Freezing for Later:
- Baked Puffs: Allow baked puffs to cool completely, then freeze them in a single layer on a baking sheet. Once frozen solid, transfer them to a freezer-safe bag or container for up to 2-3 months. Reheat from frozen in a 350°F (175°C) oven for 10-15 minutes, or until heated through and crispy.
- Unbaked Puffs: Assemble the puffs but do not apply the egg wash. Freeze them in a single layer on a parchment-lined baking sheet. Once solid, transfer to a freezer bag. When ready to bake, you can bake from frozen (add 5-10 minutes to baking time and apply egg wash before baking) or thaw in the refrigerator first.
- Uniformity for Even Baking: Try to make your puffs roughly the same size and thickness. This ensures they all bake evenly and are done at the same time. If some are much larger or smaller, you’ll have a mix of undercooked and overcooked results.
FAQ Section
- Q: Can I use ground turkey or chicken instead of beef?
A: Absolutely! Ground turkey or chicken would be excellent, lighter alternatives. Cook them the same way you would the ground beef, ensuring they are cooked through. You might want to add a little extra seasoning or a dash of soy sauce to boost their flavor, as they are generally milder than beef. - Q: How do I prevent the bottoms of my crescent puffs from getting soggy?
A: The main culprits for soggy bottoms are excess fat from the beef or too much moisture in the filling. Ensure you drain the beef thoroughly after browning. Also, don’t let the filling sit on the raw dough for too long before baking, and bake on parchment paper which can help absorb a tiny bit of grease and promote crisping. - Q: My crescent puffs burst open while baking. What did I do wrong?
A: This usually happens due to overfilling or not sealing the dough properly. Use a modest amount of filling, and make sure to pinch the seams or tuck the point of the crescent under securely. Also, if the filling is too hot when placed on the dough, it can start to melt the dough fat, weakening the structure. - Q: Can I make these vegetarian?
A: Yes! You can substitute the ground beef with a plant-based ground meat alternative, or a mixture of finely chopped and sautéed mushrooms, lentils, and black beans seasoned similarly. Ensure the vegetarian filling isn’t too wet. - Q: What’s the best way to reheat leftover Beef-Stuffed Crescent Puffs?
A: The best way to maintain their crispness is to reheat them in an oven or toaster oven at around 325-350°F (160-175°C) for 5-10 minutes, or until warmed through and crispy again. Microwaving will make them soft, though still tasty. An air fryer also works wonderfully for reheating. - Q: Can I use puff pastry instead of crescent roll dough?
A: Yes, puff pastry would create a flakier, more layered result. You’ll need to cut the puff pastry into squares or triangles, fill, seal, and bake according to the puff pastry package directions (usually at a slightly higher temperature, around 400°F/200°C). The texture will be different but equally delicious. - Q: My filling seems a bit dry. Any suggestions?
A: If your beef mixture seems too dry after cooking, you can add a tablespoon or two of beef broth, a little extra Worcestershire sauce, or even a small amount of tomato paste or ketchup to moisten it slightly. Be careful not to make it too wet, though. - Q: Can I add other seasonings or spices to the beef mixture?
A: Definitely! Feel free to customize the flavor. Consider adding a pinch of smoked paprika for a smoky depth, cumin for an earthy note, or a dash of cayenne pepper for more significant heat. Fresh herbs like chopped parsley or chives can also be stirred into the filling once it’s off the heat.


