Life gets busy, doesn’t it? Between work, family, and everything in between, sometimes the idea of baking a homemade dessert feels like a distant dream. But what if I told you that you could have a warm, bubbly, and utterly delicious berry cobbler on your table in just ten minutes of prep time? Sounds too good to be true? Well, let me tell you, it’s absolutely real, and it’s a game-changer. My family, notorious dessert critics (especially my sweet-toothed kids!), devoured this 10-minute berry cobbler in record time. The aroma alone, filling the kitchen with the sweet scent of warm berries and buttery goodness, was enough to draw everyone in. The best part? It’s so incredibly simple that even on the most hectic weeknights, you can whip this up and feel like a dessert superstar. Forget complicated recipes and hours in the kitchen – this 10-minute berry cobbler is your secret weapon for satisfying those sweet cravings without any fuss. Get ready to fall in love with the easiest and most rewarding dessert you’ll ever make!
Ingredients for Your Speedy Berry Cobbler
This recipe is all about simplicity, using pantry staples and readily available berries. Here’s what you’ll need to create this dessert magic:
- Mixed Berries (4 cups): Fresh or frozen, a mix of blueberries, raspberries, blackberries, and strawberries works beautifully. Frozen berries are particularly convenient for a quick dessert and often more budget-friendly.
- All-Purpose Flour (1 cup): The base for our quick cobbler topping, providing structure and a slightly crumbly texture.
- Granulated Sugar (1/2 cup): Adds sweetness to both the berries and the topping, balancing the tartness of the fruit. You can adjust this to your sweetness preference.
- Baking Powder (2 teaspoons): The secret ingredient that makes our topping light and fluffy, giving it that classic cobbler texture.
- Salt (1/4 teaspoon): A pinch of salt enhances the flavors of all the other ingredients, especially the sweetness of the berries.
- Cold Butter, unsalted (1/2 cup, or 1 stick): Cold butter is crucial for creating flaky layers in the topping. Cut into small cubes for easy incorporation.
- Milk (1/2 cup): Adds moisture to the topping, bringing it together and creating a soft, tender crumb. You can also use cream or half-and-half for a richer topping.
- Lemon Juice (1 tablespoon): Brightens the berry flavor and adds a touch of tanginess, complementing the sweetness perfectly.
- Optional: Vanilla Extract (1 teaspoon): Enhances the overall flavor profile with a warm, comforting note.
- Optional: Cinnamon (1/4 teaspoon): Adds a subtle spice that pairs wonderfully with berries, especially in fall and winter.
Step-by-Step Instructions for Berry Cobbler Bliss
Get ready to be amazed at how quickly this comes together! Follow these simple steps and in no time, you’ll be enjoying a warm berry cobbler:
- Preheat Your Oven and Prep Your Baking Dish: Start by preheating your oven to 375°F (190°C). While the oven is heating, lightly grease an 8×8 inch baking dish or a similar sized oven-safe skillet. This prevents the cobbler from sticking and makes serving easier.
- Prepare the Berry Filling: In your prepared baking dish, combine the mixed berries, lemon juice, and a tablespoon of sugar (from the ½ cup total). Gently toss the berries to coat them evenly with the sugar and lemon juice. This helps to macerate the berries slightly, drawing out their juices and intensifying their flavor. If using frozen berries, no need to thaw them – they can go straight into the dish.
- Make the Dry Topping Mixture: In a medium-sized mixing bowl, whisk together the flour, remaining granulated sugar, baking powder, and salt. Ensure all the dry ingredients are well combined to distribute the baking powder evenly throughout the topping, which is essential for a good rise. If you’re using cinnamon, add it to the dry ingredients at this stage.
- Cut in the Cold Butter: Add the cubed cold butter to the dry ingredients. Using a pastry blender, your fingers, or two knives, cut the butter into the flour mixture until it resembles coarse crumbs. The mixture should still have some visible pieces of butter – this is what creates those desirable flaky layers in the cobbler topping. Working quickly and keeping the butter cold is key for a tender topping.
- Add the Milk and Vanilla (Optional): Pour the milk (and vanilla extract, if using) into the bowl with the flour and butter mixture. Stir with a fork or spoon until just combined. Be careful not to overmix – overmixing can develop the gluten in the flour, resulting in a tougher topping. The batter will be slightly lumpy, which is perfectly fine.
- Assemble the Cobbler: Drop spoonfuls of the topping batter evenly over the berries in the baking dish. You don’t need to spread it perfectly smooth – the rustic, uneven topping is part of the charm of a cobbler. Leave some berries peeking through for a beautiful, bubbly effect when baking.
- Bake to Golden Perfection: Place the baking dish in the preheated oven and bake for 30-35 minutes, or until the topping is golden brown and the berry filling is bubbly and hot. The baking time might vary slightly depending on your oven and the depth of your baking dish. The cobbler is done when a toothpick inserted into the topping comes out clean, and the berry juices are bubbling around the edges.
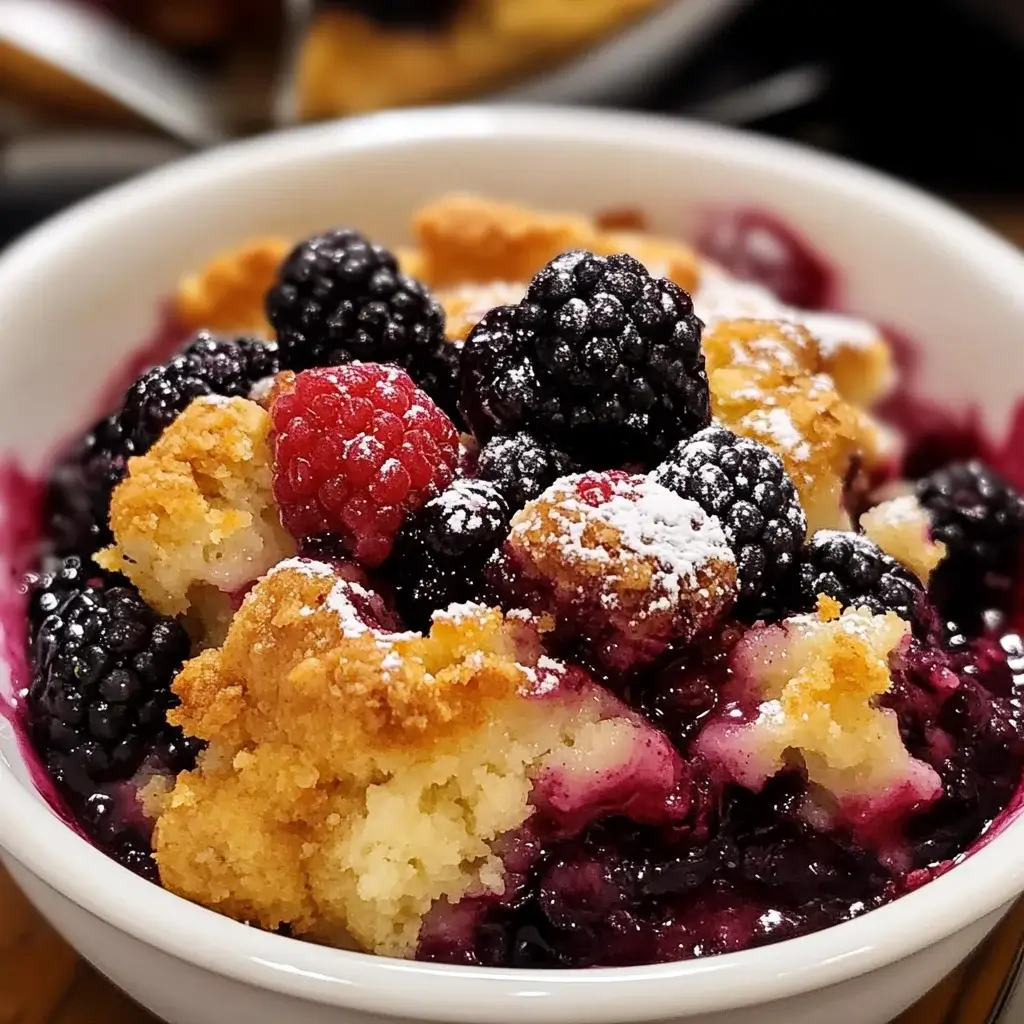
- Cool Slightly and Serve: Once baked, remove the berry cobbler from the oven and let it cool for a few minutes before serving. This allows the berry juices to thicken slightly and prevents burning your tongue on molten hot berries! Serve warm on its own, or with your favorite toppings like vanilla ice cream, whipped cream, or a dusting of powdered sugar. Enjoy the delightful simplicity and deliciousness of your homemade 10-minute berry cobbler!
Berry Cobbler Nutrition: A Sweet Treat with a Side of Goodness
While berry cobbler is undeniably a dessert, it does offer some nutritional benefits, especially thanks to the berries! Here’s a general estimate of the nutrition facts per serving (based on 6 servings, using standard ingredients and estimations):
- Serving Size: 1/6 of the cobbler
- Calories: Approximately 250-300 calories per serving
- Total Fat: 12-15g
Important Note: These values are estimates and can vary based on the specific ingredients used, portion sizes, and brands. Using less sugar, whole wheat flour, or different types of milk can affect the nutritional profile. Remember that this is a dessert to be enjoyed in moderation as part of a balanced diet. The berries do contribute vitamins, antioxidants, and fiber, making it a slightly more wholesome dessert option compared to some others.
Prep Time Perfection: Berry Cobbler in Just Minutes
The name “10-Minute Berry Cobbler” isn’t an exaggeration – the active preparation time for this recipe truly is around 10 minutes! This incredible speed is thanks to the straightforward ingredients and minimal steps involved. There’s no need for complex pastry making, chilling dough, or intricate layering. You simply toss the berries with a bit of sugar and lemon juice, whisk together the dry topping ingredients, cut in the cold butter (which takes mere minutes with a pastry blender or even just your fingers), add milk, and drop it over the berries. The oven does the rest of the work! This recipe is perfect for those moments when you crave a homemade dessert but are short on time or energy. It’s a fantastic option for weeknight treats, last-minute gatherings, or anytime you need a quick and comforting dessert fix without spending hours in the kitchen. The ease and speed of preparation are a major part of what makes this berry cobbler so appealing and a recipe you’ll turn to again and again.
Serving Suggestions: Elevate Your Berry Cobbler Experience
While delicious on its own, there are many ways to enhance your 10-minute berry cobbler and make it even more special. Here are some serving suggestions to consider:
- Classic Vanilla Ice Cream: The quintessential pairing! The cold, creamy vanilla ice cream melts slightly against the warm cobbler, creating a delightful contrast in temperature and texture.
- Whipped Cream: A light and airy dollop of freshly whipped cream adds a touch of elegance and richness. You can even flavor your whipped cream with a hint of vanilla or cinnamon.
- Creme Fraiche or Sour Cream: For a tangier counterpoint to the sweetness of the cobbler, try serving it with a spoonful of creme fraiche or sour cream. This adds a lovely creamy texture and a subtle sour note that complements the berries beautifully.
- Greek Yogurt: A healthier option that still provides creaminess and a slight tang. Plain or vanilla Greek yogurt works wonderfully.
- Dusting of Powdered Sugar: A simple and elegant way to finish your cobbler. A light dusting of powdered sugar adds a touch of sweetness and visual appeal.
- Fresh Mint or Basil: Garnish with a sprig of fresh mint or basil for a pop of color and a hint of freshness. The herbal notes surprisingly complement the berry flavors.
- Warm Cobbler with Cold Milk: Some people simply enjoy a warm slice of cobbler with a cold glass of milk – a comforting and nostalgic combination.
- Fruit Coulis: For a more sophisticated presentation, drizzle a berry or raspberry coulis (pureed and strained berries) over the warm cobbler. This intensifies the berry flavor and adds a beautiful sauce.
Pro Tips for the Perfect 10-Minute Berry Cobbler
To ensure your 10-minute berry cobbler is a resounding success every time, keep these pro tips in mind:
- Use Cold Butter: This is crucial for a flaky and tender topping. Cold butter creates small pockets of fat within the flour mixture, which melt during baking and create those desirable layers and crumbly texture. If your kitchen is warm, you can even chill the butter and dry ingredients briefly before combining.
- Don’t Overmix the Topping: Overmixing develops the gluten in the flour, leading to a tougher, less tender topping. Mix just until the milk is incorporated and the dry ingredients are moistened. A few lumps are perfectly fine.
- Adjust Sugar to Berry Sweetness: The amount of sugar in the recipe is a guideline. If your berries are particularly sweet, you can reduce the sugar slightly. If they are tart, you may want to add a little more. Taste your berries before adding sugar to gauge their sweetness level.
- Experiment with Different Berries: While mixed berries are classic, feel free to use any combination of berries you like or have on hand. Blueberry cobbler, raspberry cobbler, strawberry cobbler, or even a combination with stone fruits like peaches or nectarines would be delicious variations.
- Add Spices for Warmth: For a cozy fall or winter cobbler, add a pinch of cinnamon, nutmeg, or ginger to the dry topping mixture. These spices complement berry flavors beautifully and add a warm, comforting note.
- Use Frozen Berries Directly: No need to thaw frozen berries! They can go straight into the baking dish. Baking from frozen actually helps to prevent the cobbler from becoming too watery, as the berries release their juices slowly during baking.
- Make it Ahead (Partially): You can prepare the berry filling and the dry topping mixture separately ahead of time. Store them in airtight containers at room temperature. When ready to bake, simply cut in the butter, add milk, assemble, and bake. This can save you even more time on busy days.
- Reheat Cobbler Gently: Leftover cobbler can be reheated in the oven or microwave. For the oven, bake at 350°F (175°C) until warmed through. In the microwave, reheat in short intervals to prevent the topping from becoming soggy. A brief crisping in a toaster oven can also revive the topping texture.
Frequently Asked Questions About Your Berry Cobbler
Got questions about making the perfect 10-minute berry cobbler? Here are answers to some common queries:
Q1: Can I use frozen berries for this cobbler?
A: Absolutely! Frozen berries are fantastic for this recipe. You don’t even need to thaw them first – just use them straight from the freezer. They often work even better as they release their juices more slowly during baking, preventing a watery cobbler.
Q2: Can I use different types of fruit besides berries?
A: Yes, you can! While this recipe is for berry cobbler, you can easily adapt it for other fruits like peaches, apples, cherries, or a mix of stone fruits. Adjust the sugar level depending on the sweetness of the fruit you choose.
Q3: How do I store leftover berry cobbler?
A: Store leftover berry cobbler in an airtight container in the refrigerator for up to 3-4 days. Reheat gently before serving for the best texture and flavor.
Q4: Can I make this cobbler ahead of time and bake it later?
A: It’s best to bake the cobbler fresh for the best texture. However, you can prepare the berry filling and the dry topping mixture separately ahead of time (as mentioned in the tips). Assemble and bake just before serving.
Q5: Can I double the recipe?
A: Yes, you can easily double the recipe if you need to serve a larger crowd. Use a larger baking dish, such as a 9×13 inch pan, and increase the baking time slightly, checking for doneness as described in the instructions.
Q6: What if I don’t have baking powder? Can I still make the cobbler?
A: Baking powder is essential for the light and fluffy topping. While you might be able to make a cobbler without it, the texture will be denser and less like a traditional cobbler. It’s highly recommended to use baking powder for the best results.
Q7: Can I use a different type of flour, like whole wheat flour?
A: Yes, you can substitute part of the all-purpose flour with whole wheat flour for a slightly nuttier flavor and added fiber. However, using all whole wheat flour may result in a denser topping. Start by substituting about half of the all-purpose flour with whole wheat flour.
Q8: How do I prevent my cobbler from becoming soggy?
A: To prevent sogginess, avoid overfilling the baking dish with berries. Using frozen berries directly and not overmixing the topping also helps. Make sure the cobbler is baked until the topping is golden brown and cooked through, and the berry juices are bubbly and thickened. Serving it shortly after baking also prevents the topping from absorbing too much moisture from the berries over time.

10-Minute Berry Cobbler
Ingredients
This recipe is all about simplicity, using pantry staples and readily available berries. Here’s what you’ll need to create this dessert magic:
- Mixed Berries (4 cups): Fresh or frozen, a mix of blueberries, raspberries, blackberries, and strawberries works beautifully. Frozen berries are particularly convenient for a quick dessert and often more budget-friendly.
- All-Purpose Flour (1 cup): The base for our quick cobbler topping, providing structure and a slightly crumbly texture.
- Granulated Sugar (1/2 cup): Adds sweetness to both the berries and the topping, balancing the tartness of the fruit. You can adjust this to your sweetness preference.
- Baking Powder (2 teaspoons): The secret ingredient that makes our topping light and fluffy, giving it that classic cobbler texture.
- Salt (1/4 teaspoon): A pinch of salt enhances the flavors of all the other ingredients, especially the sweetness of the berries.
- Cold Butter, unsalted (1/2 cup, or 1 stick): Cold butter is crucial for creating flaky layers in the topping. Cut into small cubes for easy incorporation.
- Milk (1/2 cup): Adds moisture to the topping, bringing it together and creating a soft, tender crumb. You can also use cream or half-and-half for a richer topping.
- Lemon Juice (1 tablespoon): Brightens the berry flavor and adds a touch of tanginess, complementing the sweetness perfectly.
- Optional: Vanilla Extract (1 teaspoon): Enhances the overall flavor profile with a warm, comforting note.
- Optional: Cinnamon (1/4 teaspoon): Adds a subtle spice that pairs wonderfully with berries, especially in fall and winter.
Instructions
Get ready to be amazed at how quickly this comes together! Follow these simple steps and in no time, you’ll be enjoying a warm berry cobbler:
- Preheat Your Oven and Prep Your Baking Dish: Start by preheating your oven to 375°F (190°C). While the oven is heating, lightly grease an 8×8 inch baking dish or a similar sized oven-safe skillet. This prevents the cobbler from sticking and makes serving easier.
- Prepare the Berry Filling: In your prepared baking dish, combine the mixed berries, lemon juice, and a tablespoon of sugar (from the ½ cup total). Gently toss the berries to coat them evenly with the sugar and lemon juice. This helps to macerate the berries slightly, drawing out their juices and intensifying their flavor. If using frozen berries, no need to thaw them – they can go straight into the dish.
- Make the Dry Topping Mixture: In a medium-sized mixing bowl, whisk together the flour, remaining granulated sugar, baking powder, and salt. Ensure all the dry ingredients are well combined to distribute the baking powder evenly throughout the topping, which is essential for a good rise. If you’re using cinnamon, add it to the dry ingredients at this stage.
- Cut in the Cold Butter: Add the cubed cold butter to the dry ingredients. Using a pastry blender, your fingers, or two knives, cut the butter into the flour mixture until it resembles coarse crumbs. The mixture should still have some visible pieces of butter – this is what creates those desirable flaky layers in the cobbler topping. Working quickly and keeping the butter cold is key for a tender topping.
- Add the Milk and Vanilla (Optional): Pour the milk (and vanilla extract, if using) into the bowl with the flour and butter mixture. Stir with a fork or spoon until just combined. Be careful not to overmix – overmixing can develop the gluten in the flour, resulting in a tougher topping. The batter will be slightly lumpy, which is perfectly fine.
- Assemble the Cobbler: Drop spoonfuls of the topping batter evenly over the berries in the baking dish. You don’t need to spread it perfectly smooth – the rustic, uneven topping is part of the charm of a cobbler. Leave some berries peeking through for a beautiful, bubbly effect when baking.
- Bake to Golden Perfection: Place the baking dish in the preheated oven and bake for 30-35 minutes, or until the topping is golden brown and the berry filling is bubbly and hot. The baking time might vary slightly depending on your oven and the depth of your baking dish. The cobbler is done when a toothpick inserted into the topping comes out clean, and the berry juices are bubbling around the edges.
- Cool Slightly and Serve: Once baked, remove the berry cobbler from the oven and let it cool for a few minutes before serving. This allows the berry juices to thicken slightly and prevents burning your tongue on molten hot berries! Serve warm on its own, or with your favorite toppings like vanilla ice cream, whipped cream, or a dusting of powdered sugar. Enjoy the delightful simplicity and deliciousness of your homemade 10-minute berry cobbler!
Nutrition
- Serving Size: one normal portion
- Calories: 300
- Fat: 15g